Prepare for National Championships with Primed to Fight—a series where we break down two different viable Classic Constructed decklists, their matchups, and sideboard options. Sleeve up, get reps, and secure your victory!
Ah. Greetings. You must be our new Imperial field commander. Come in. Take a seat and make yourself comfortable. I’ve just put on a fresh pot of the finest tea in all of Deshvahan. We need to get you familiar with some of the soldiers at your disposal and make sure you’re prepared for your upcoming battle. I can’t have my commanders out in the field unless they’re properly Primed to Fight.
Fang, Dracai of Blades
Few Warriors in the Imperial army are quite as fierce, or as loyal to the cause than Captain Fang of the Royal Guard. The Dracai of Blades is a Warrior of unparalleled prowess, able to leverage his fealty to the Fallen Dragon and turn it into a resource. Fang becomes a truly terrifying whirlwind of steel once he reaches a critical threshold of three Fealty, foregoing a more disruptive style of combat for one that seeks to simply bury his opponent in raw power.
Let’s dive into what makes Fang, Dracai of Blades such a formidable choice for your upcoming battle.
The Core
At his heart, Fang is two decks smashed together. When the game begins, we’ll find ourselves starting out at a slight disadvantage from our opponent. Without Fealty, each of our daggers will cost a resource to swing (and we really want to be swinging our daggers to make the most of some of our most powerful cards).
But once we can reach that critical three Fealty mark and make our daggers free, Fang suddenly becomes a true monster, able to put out consistent turn over turn damage that will make even the most powerful Runeblades jealous.
So, like any good hunter, patience is a virtue. We’re prepared to start the game a little bit behind, confident that once our prey lets down their guard for even a moment, we’ll be there waiting to twist the knife.

Fang, Dracai of Blades
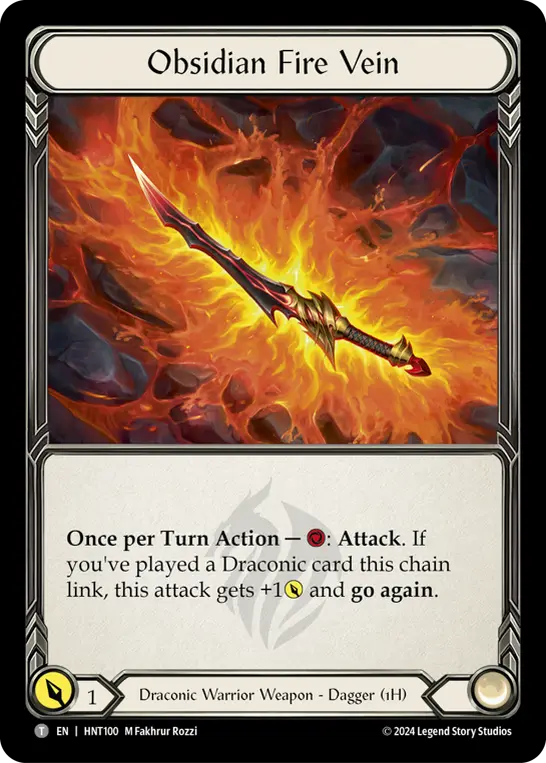
Obsidian Fire Vein
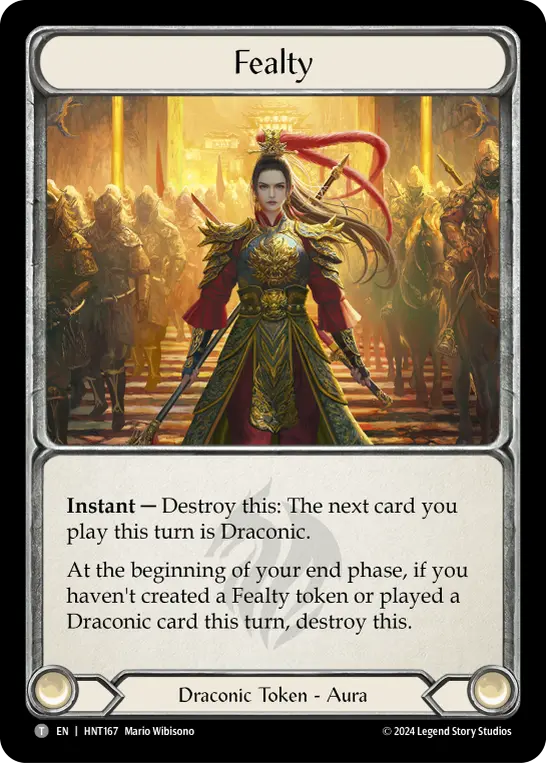
Fealty
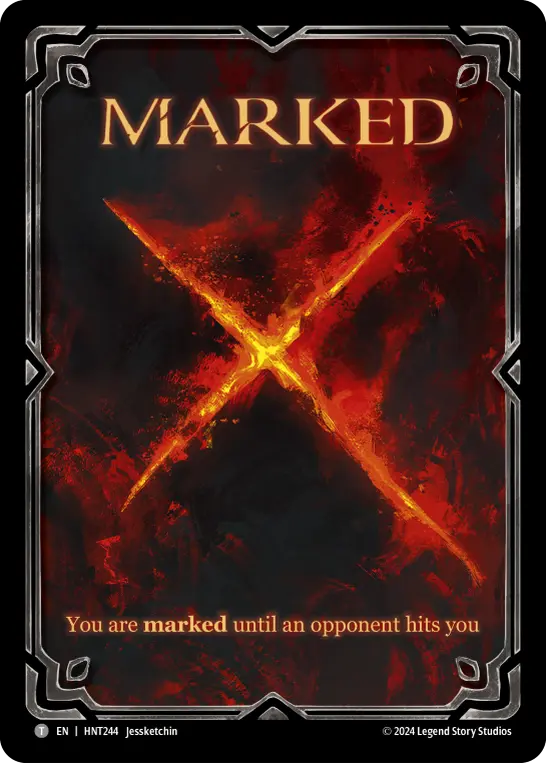
Marked
From the moment the game begins, we should immediately begin to start looking for ways to start building our Fealty stack so that we can reach that second phase of our game plan as soon as possible. We can look to cards like Affirm Loyalty and Pledge Fealty to just instantly grant us Fealty tokens without needing to worry about our troublesome opponent being able to stop us from reaching our goal.
But aside from a few exceptions, most of our Fealty will be coming from hitting a marked opponent. In these early turns, we want to be putting a high priority on cards that mark our opponent, or leverage our difficult to block attack reactions (as well as 4-power attack actions in arsenal) to push damage over our opponent’s blocking cards to convert those marks into Fealty. Cards like Scar Tissue and Searing Gaze can be excellent for both ways to mark our opponent, as well as tricky attack reactions to push damage over our opponent’s defenses to convert previously established marks. And don’t forget tricky instant speed marks such as Proclaim Vengeance to really keep ourselves especially unpredictable.
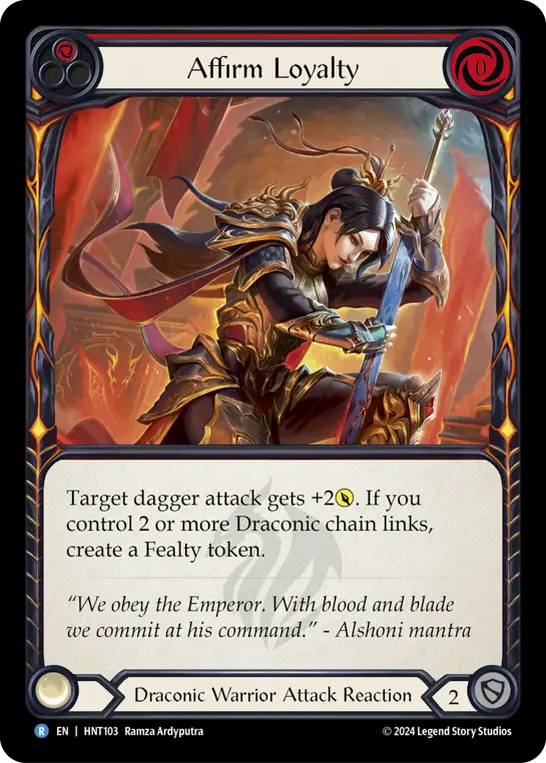
Affirm Loyalty
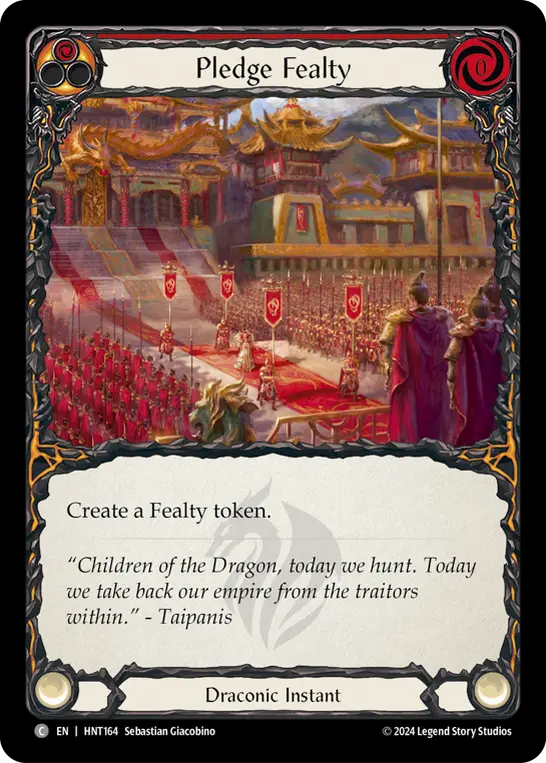
Pledge Fealty
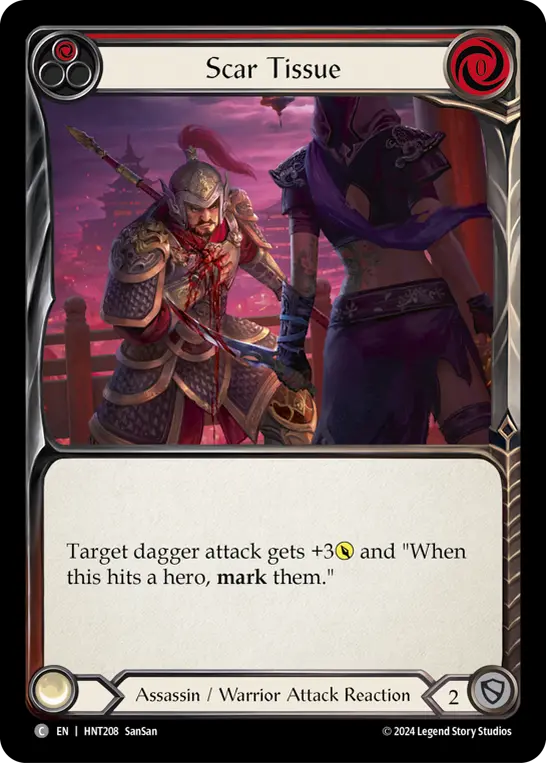
Scar Tissue
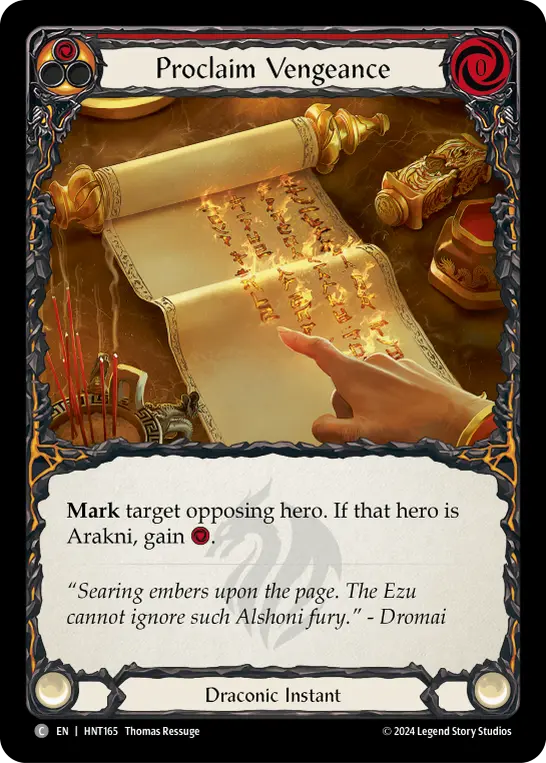
Proclaim Vengeance
Once we’ve proven our loyalty to our fallen Emperor and reached that crucial three Fealty threshold, the real fun can begin. Fang isn’t a hero looking to be sneaky or disruptive. Once our hero power is active and our daggers are free, it’s time to hit the gas and bury our opponent in raw numbers.
Nearly every Draconic attack reaction in our deck now pushes a dagger to at least 4 or more power, and the terrifying Hunt’s End buffs our tiny little dagger swing to a whopping 6-power, all without spending a single resource. Combined with the ability of Tooth of the Dragon to punish an opponent who wants to over-block a dagger to shield themselves, Fang becomes a nightmare to effectively predict where his damage will be coming from.
We can even pull out more than just two dagger swings per turn with cards like Long Whisker Loyalty and Twist and Turn, making our damage output even more unpredictable. Remember that we want to avoid using two Draconic attack reactions on the same dagger attack if we can help it, since we only get the +1 from the dagger once per attack.
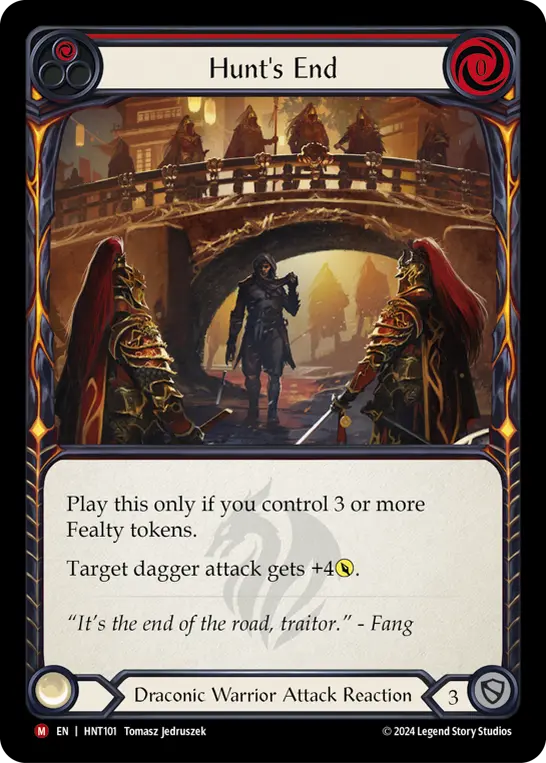
Hunt's End
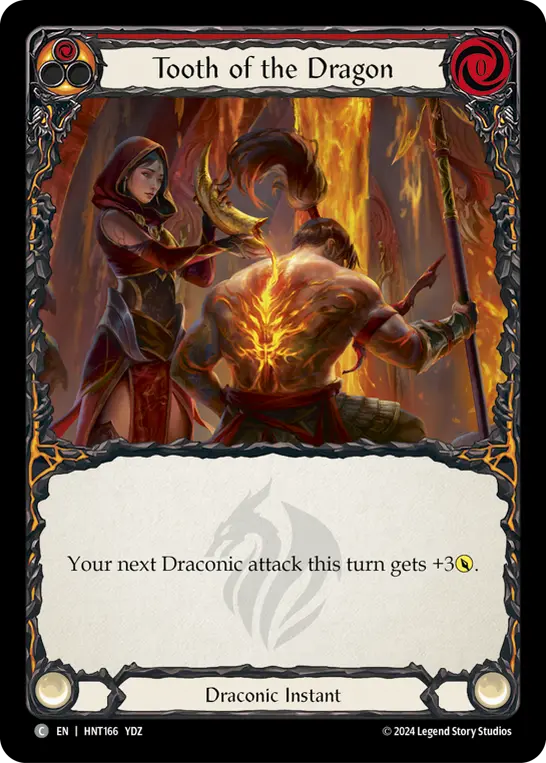
Tooth of the Dragon
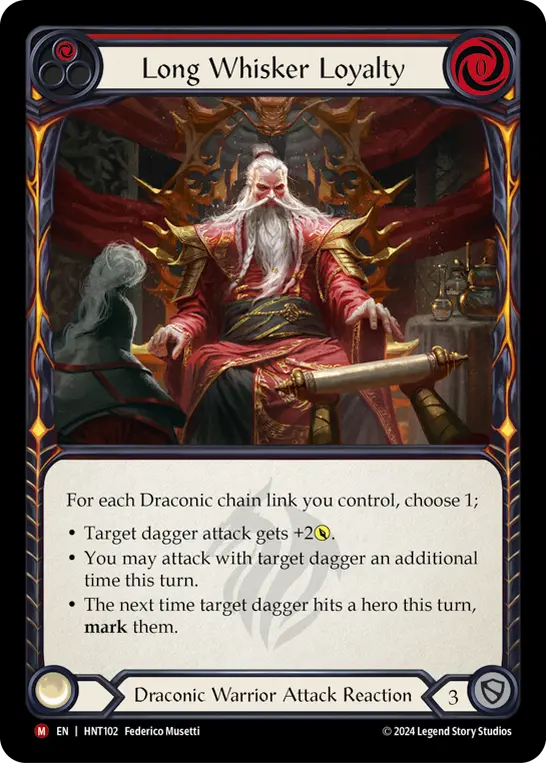
Long Whisker Loyalty

Twist and Turn
Once we’re online, don’t forget that we still want to keep the marks and Fealty flowing. We can still gain additional value from surplus Fealty by spending it to convert our non-Draconic attack reactions to leverage the extra buff and go again from our daggers, or to keep playing non-Draconic cards while under the restriction of Oath of Loyalty. We can also use those marks to trigger the effects on cards like Hunt to the Ends of Rathe and Savor Bloodshed to keep our damage flowing turn after turn.
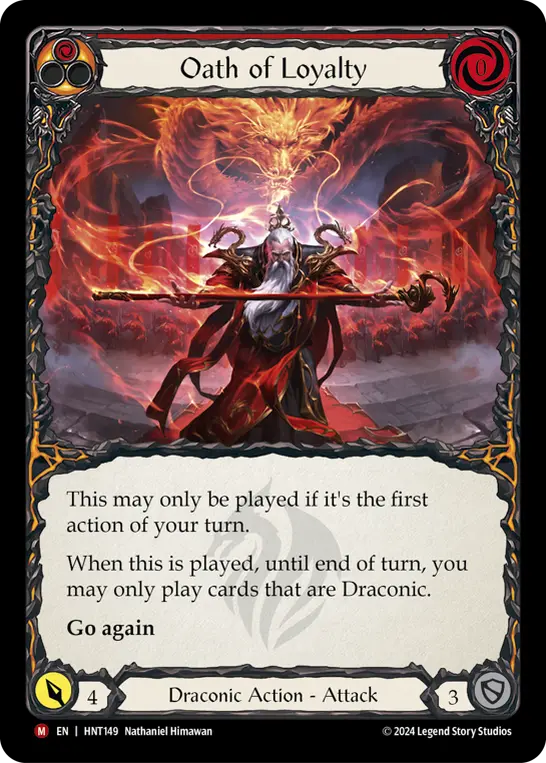
Oath of Loyalty
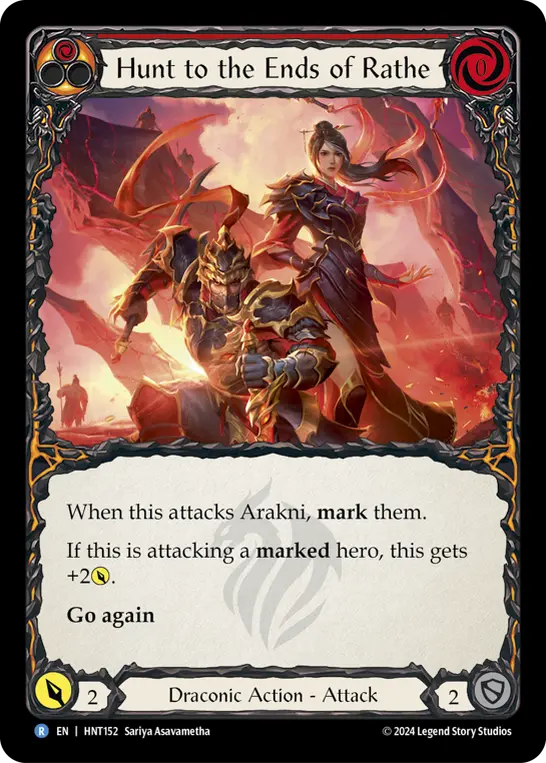
Hunt to the Ends of Rathe
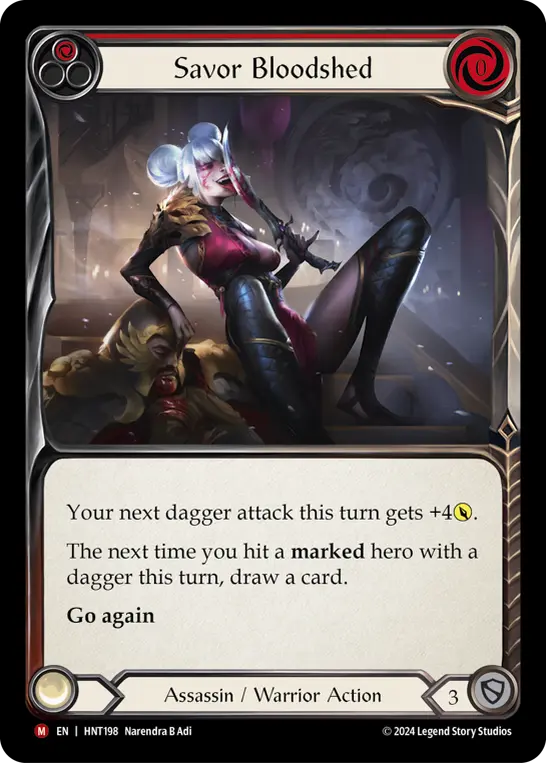
Savor Bloodshed
The Equipment
Warriors in Flesh and Blood are renowned for their incredibly potent armor suites, and Fang is no different. Crown of Providence provides an excellent way to both protect us from arsenal disruption like Command and Conquer or Leave No Witnesses, as well as some much needed filtering to help tuck cards like Hunt's End away for the late game when they happen to show up a little too early.
Braveforge Bracers offers a lot of defensive value, while also giving us an outlet for a little extra buff for a dagger in the few times we might find ourselves with a spare resource once we no longer need them.
Any good Warrior player can tell you just how wildly powerful Valiant Dynamo is for any hero able to consistently swing two weapons a turn, and I certainly won’t be the one to argue against them. But don’t sleep on the incredible utility offered by Dragonscaler Flight Path in games against more defensive opponents, where pushing damage over their defenses is more important than a couple of extra block value on our shoes. Wait for the moment where your opponent commits just a few too many cards to defense, before slamming Dragonscaler Flight Path down and send the dagger again, ignoring their whole block. Watching the horror on your opponent’s face from a well timed Dragonscaler Flight Path activation is one of the best feelings in Flesh and Blood.
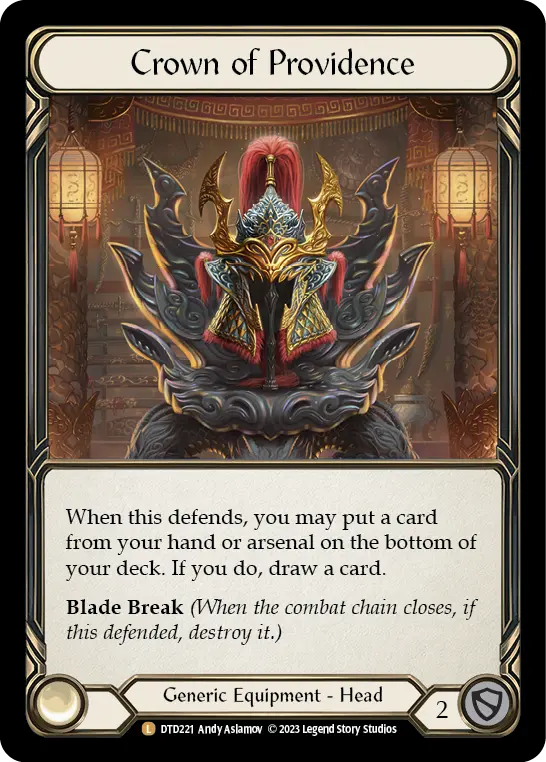
Crown of Providence
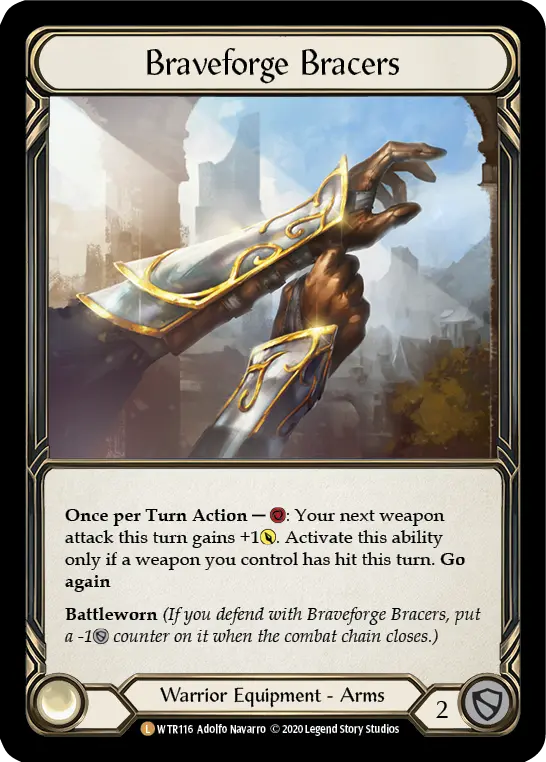
Braveforge Bracers
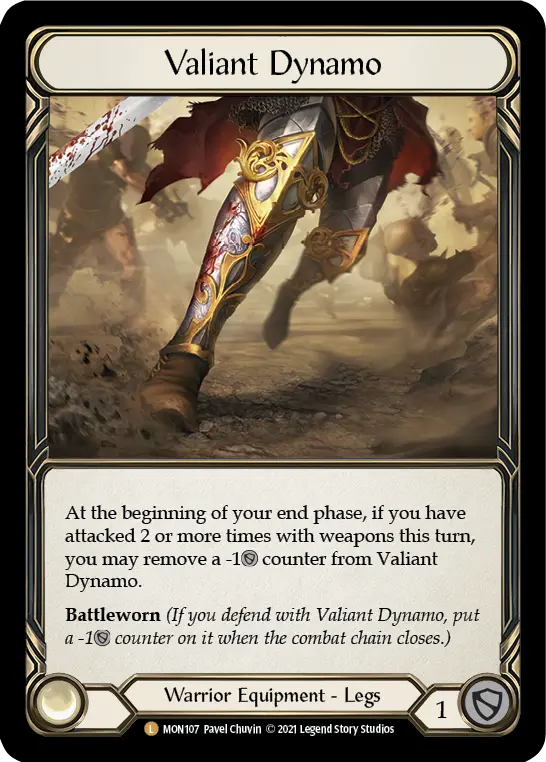
Valiant Dynamo
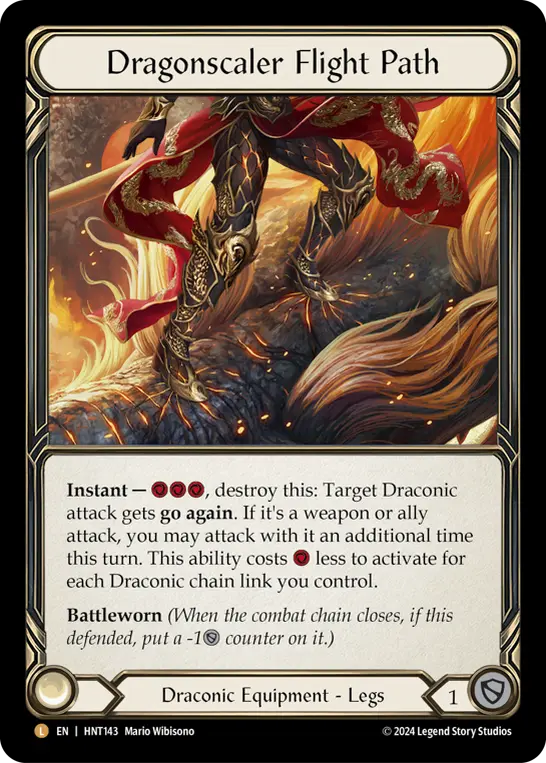
Dragonscaler Flight Path
Then of course there’s Grains of Bloodspill, able to shunt our spare resources from turns where we have them forward into a future turn where we may not have the resources to spare to send our crucial daggers before we get our Fealty online. But we can’t talk about Grains without getting into…
The Resources
Once we’re online we typically don’t want to be pitching cards at all, but we need at least some way to make resources so we can function before we hit that crucial third Fealty. Currently there are two primary schools of thought for Fang’s resource base.
You can choose to play a base of blues that often runs cards like Glint the Quicksilver, Tip-Off, or Relentless Pursuit. The blues offer a very strong resource base before we get online, letting us easily swing both daggers, as well as leave a resource floating to threaten an activation of Grains of Bloodspill to send another resource forward to our next turn as well. But in exchange, we are forced to include a handful of cards that are pretty lackluster once we get the engine going and no longer need them for pitching.
But of course, they wouldn’t call me the Empress of Volcor if I didn’t do everything in my power to avoid putting blue cards in my deck. So instead, I personally prefer running a resource base of yellows. By switching to yellows we can trade out our mediocre blues for more power like Scar Tissue, Diced, and To the Point, as well as three more copies of the excellent Twist and Turn. This build does make a few concessions in the early game, often aiming to only send one very large dagger rather than aiming to send two daggers every turn, but in exchange we get a much higher density of aggressive threats once we cross the Fealty threshold and start doing real damage.
I’d advise you to check out both versions and see which best suits your personal playstyle, or find a mix of the two that suits you best!
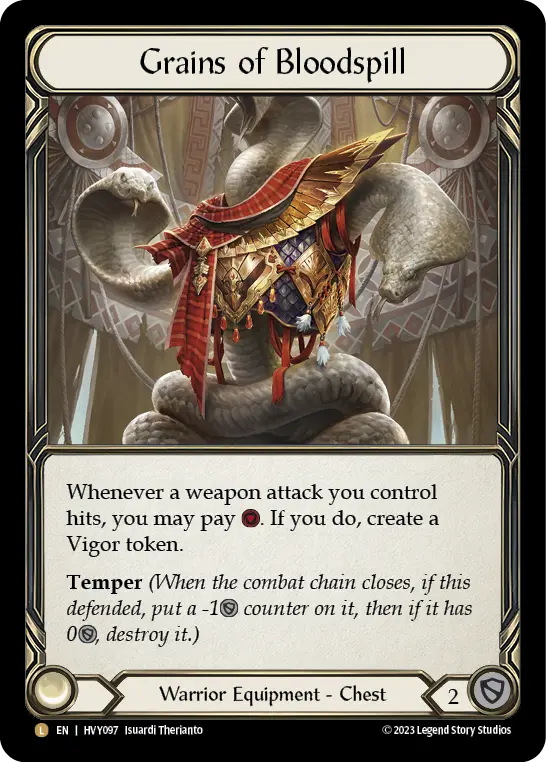
Grains of Bloodspill
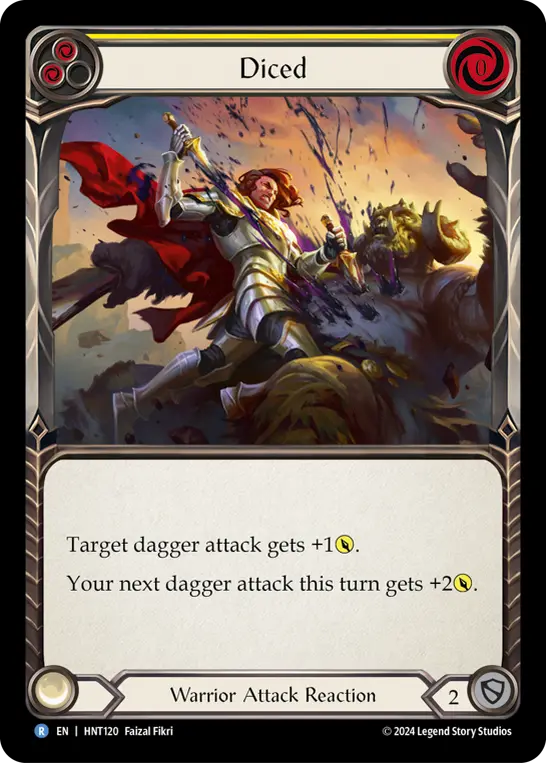
Diced
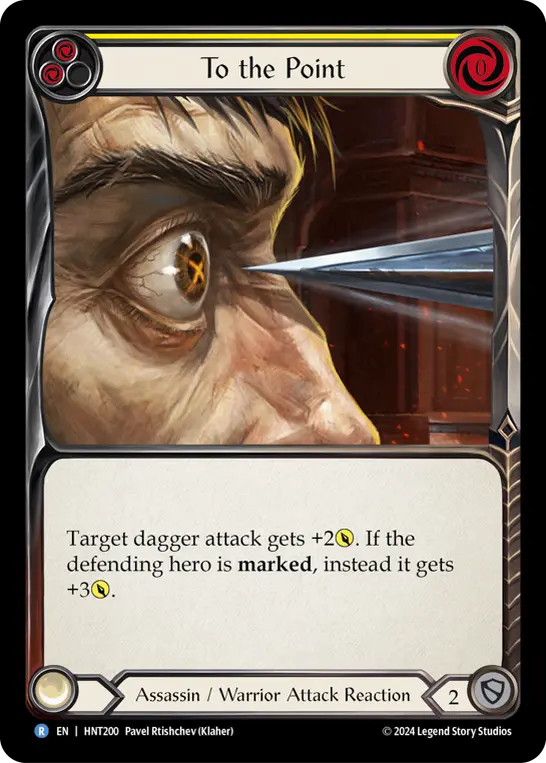
To the Point
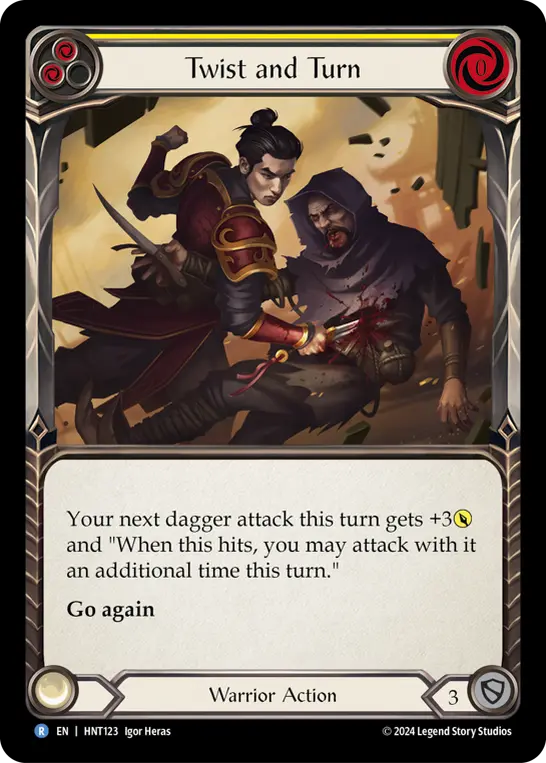
Twist and Turn
The Sideboard
One of the best things about playing Fang is just how straightforward our game plan is. Our goal is to get our Fealty stack up as quickly and efficiently as possible, and once we do that, we’re going to throw massive numbers at our opponents. If we accomplish our goal quickly enough, there’s almost no deck in the game that can stand up to our onslaught. We get to be the one asking the questions and forcing action. It’s up to our opponent to figure out how to stop us. Because of this, we are offered an immense amount of flexibility in our sideboard, since our primary game plan changes so little from matchup to matchup, and very little of our core really needs to shift between opponents.
Typically I find it easy to break my matchups down into two primary camps to inform a majority of my sideboard decisions:
- Decks that want to block us
- Decks that want to race us
Against decks that want to race us, like Cindra or Arakni, I don’t need to do a lot of fancy tricks to get online. The deck is built to get online quickly and I don’t need to do too much to augment that. Instead, I want to spend my sideboard slots bringing in a few defensive tools to slow my opponent down during those crucial early turns to ensure that we’re not letting our opponent get too far ahead of us before we can really hit the gas.
Cards like Smoke Out, Den of the Spider, and Sink Below are excellent defensive tools while still advancing our primary plan (either through marking our opponent, or helping us dig to find more ways to make Fealty). I find these matchups to be the ones where Valiant Dynamo shines the brightest.
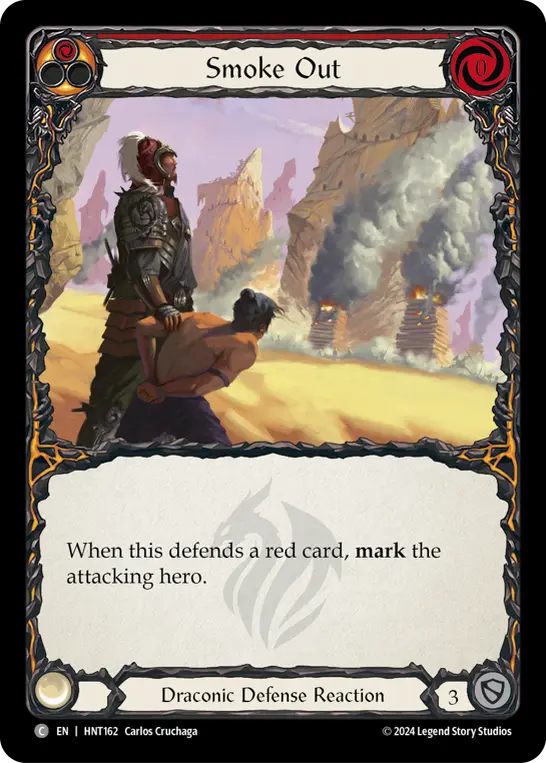
Smoke Out

Den of the Spider
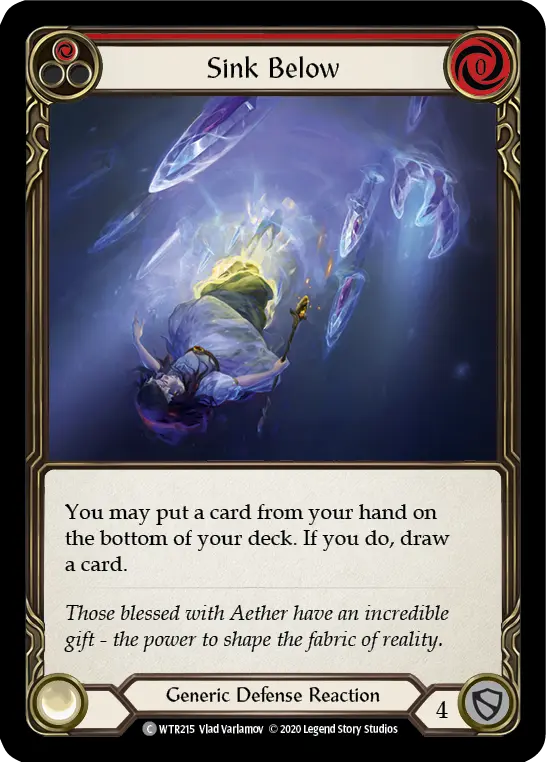
Sink Below
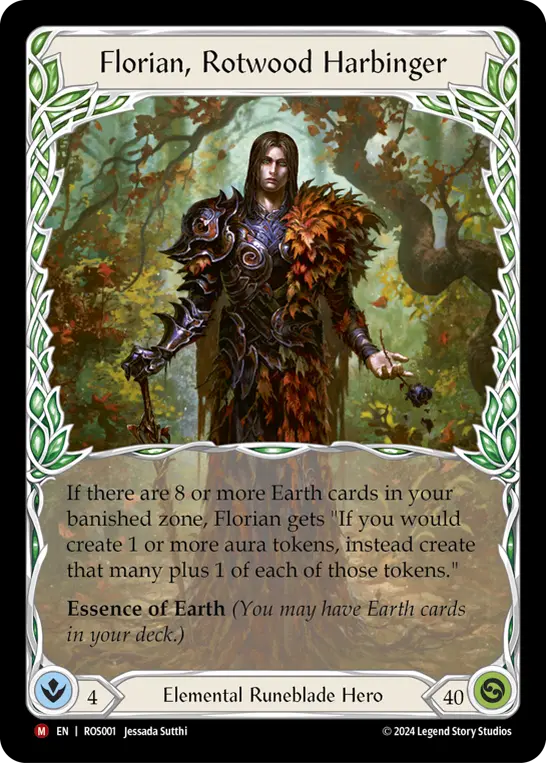
Against decks that want to block us, like Florian or Victor, we need a slightly different approach. We aren’t under quite as much pressure to get online as quickly as possible, but we want to try and find more ways to make Fealty without our opponent being able to interact.
Cards like Pledge Fealty and For the Dracai are at a premium against the defensive decks, and some players may even want to consider their bigger cousins in Endear Devotion or For the Realm if you’re on a build with some spare resources. Tenacity is an additional way to set up that massive final turn to get those last few points of damage and really close out a game.
Pledge Fealty
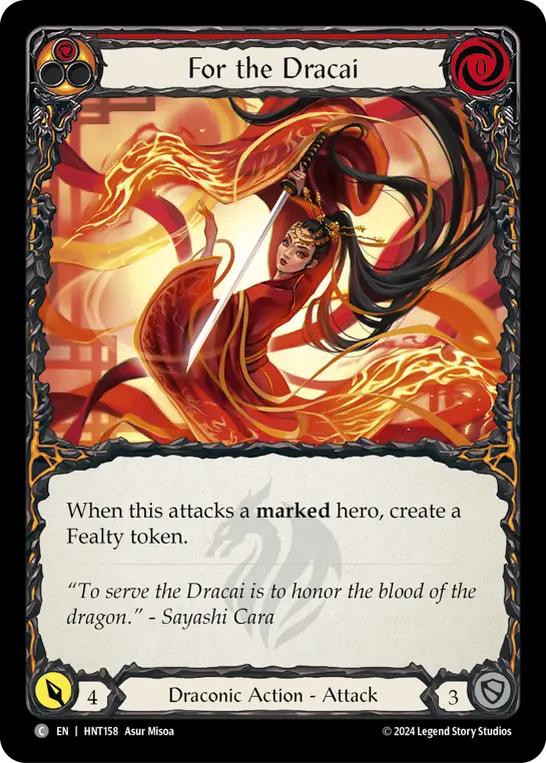
For the Dracai

Tenacity
Beyond those two core angles, our sideboard is wide open for plenty of cards to target more specific odd matchups. For example, Battlefront Bastion, while very difficult for us to ever actually cast, makes for a fantastic 7-power popper against an opposing Prism player’s high value phantasm attacks. What else you decide to include here will depend on what you're expecting to face at your local National Championship.
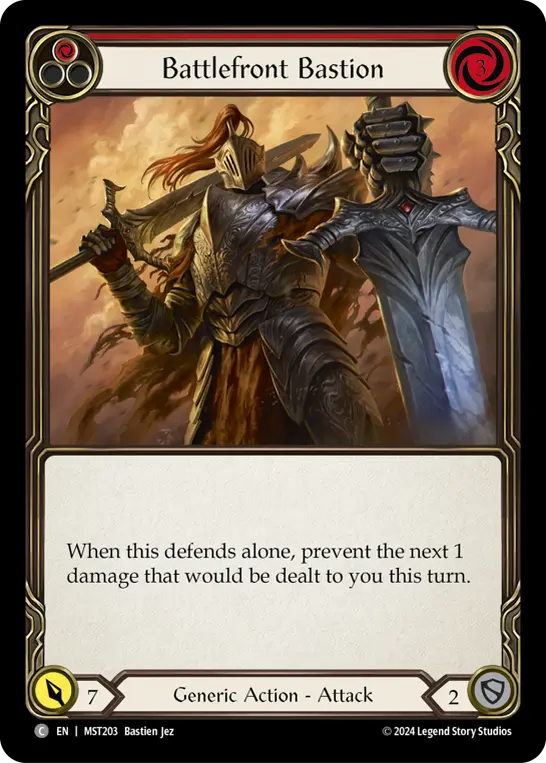
Battlefront Bastion
Florian, Rotwood Harbinger
Officially the court does not recognize the deeds of those beyond the borders of Volcor. However, these are dark times, and the looming spread of Chaos has made for strange allies. Should you find yourself in the deepest thickets of Candlehold and in need of a guide to lead you through the flowing tides of battle in this ever-shifting landscape, you could do worse than to seek the aid of the Harbinger of the Rotwood.
Florian wields the essence of both life and death in his palm and is no stranger to the hard choices of combat. He would make a powerful ally for those brave enough to seek him out.
Below is all the information the Imperial agents have managed to collect on the Rotwood Harbinger.
The Core
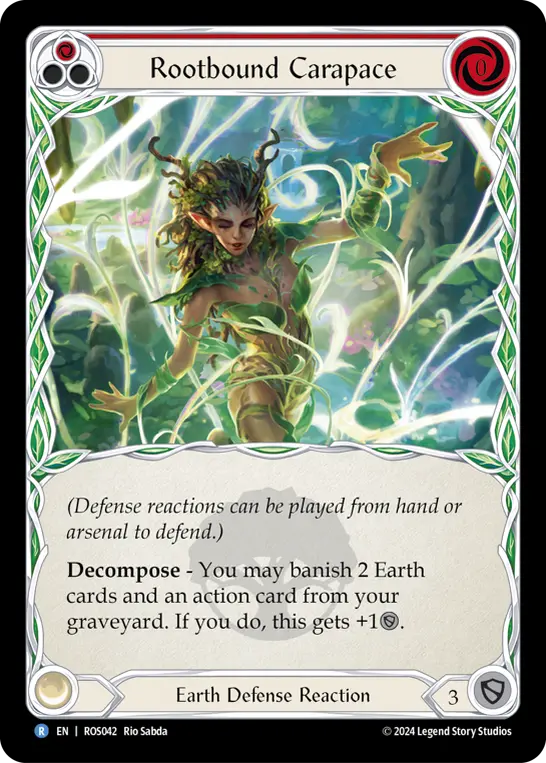
At the center of his game plan, Florian is not wholly unlike Fang. A deck with a demand on its pilot to achieve a task before unlocking their true potential. Though where Fang seeks to build Fealty, Florian harvests a bounty of rot, as he demands 8 Earth cards in his banished zone before reaching his peak efficiency. Generally, this will be done through liberal use of the decompose mechanic, utilizing cards like Rootbound Carapace and Cadaverous Tilling.
Florian, Rotwood Harbinger
Rootbound Carapace
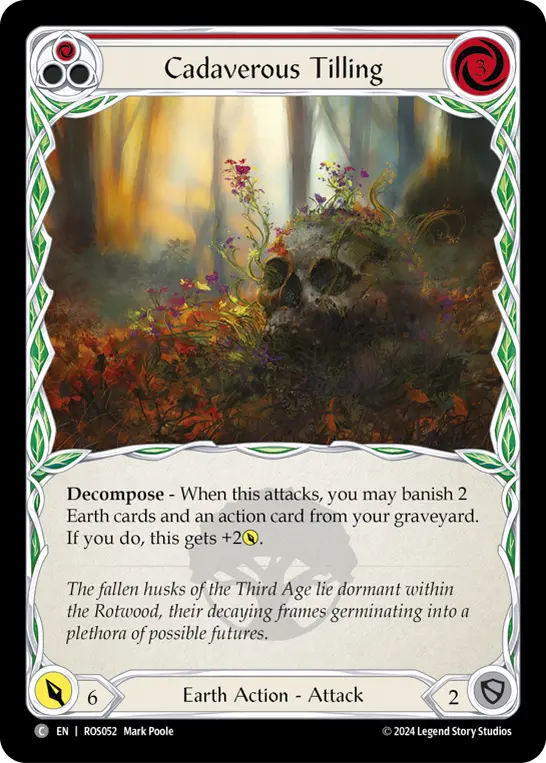
Cadaverous Tilling
Of course, before we can banish cards from our graveyard, we’ll need to get the cards into the graveyard. Thankfully, Florian is typically more than happy to play a long, slow game, taking advantage of his ability to block with Earth cards like Autumn’s Touch or the newly added Everbloom // Life, in combination the discard effect of Fruits of the Forest to give us a little extra life buffer when our opponent doesn’t allow us to just block with our spare Earth cards to fill our grave.

Everbloom||Life
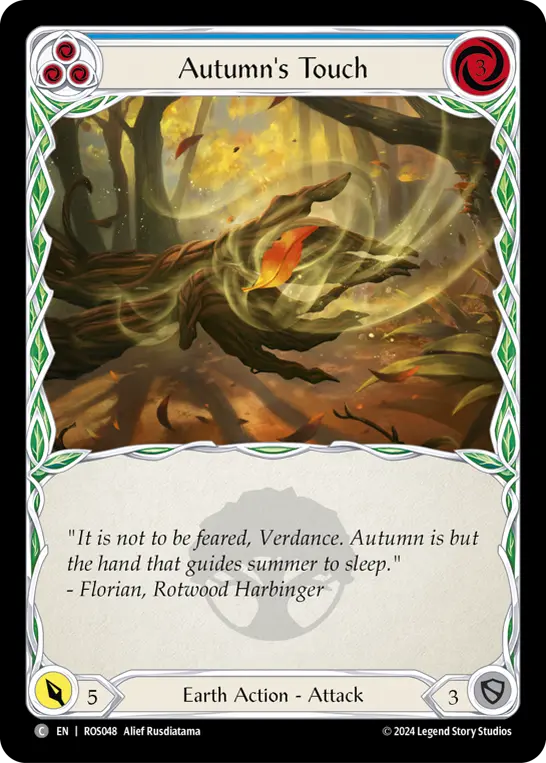
Autumn's Touch
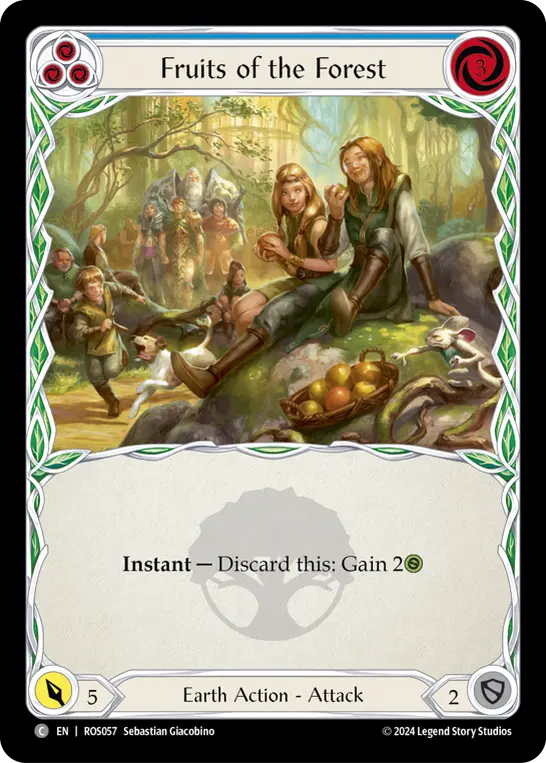
Fruits of the Forest
Unlike Fang, Florian is in much less of a rush to get online as quickly as possible. We’re more than happy to play a little defensively as we slowly nurture our garden. We also have incredibly powerful disruptive tools in Felling of the Crown, Plow Under, and Command and Conquer to give us a little extra breathing room against an opponent who might seek to close out the game before we can reach our critical amount of banished Earth cards.
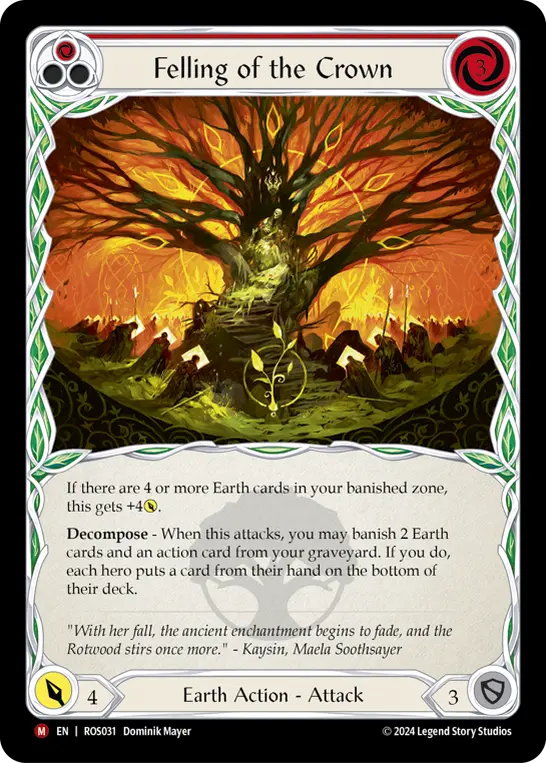
Felling of the Crown
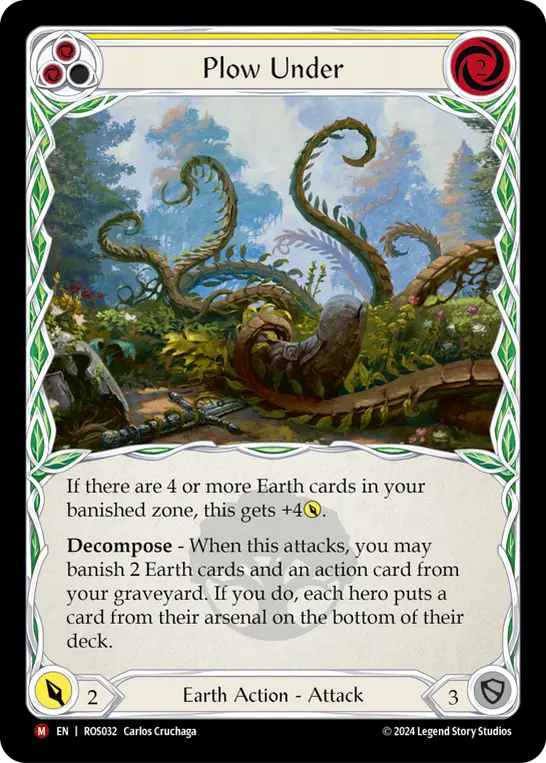
Plow Under

Command and Conquer
Once we’ve successfully navigated the early game, and finally reached our online state, the fun can really begin. Being able to double our token generation can turn some of our already impressive cards into an avalanche of efficient, powerful effects, potent enough to bury even the most stalwart of foes.
Arcane Seeds // Life now generates four Runechants for a zero resource investment (and gains us a life as an extra kicker!), Haunting Rendition gets to double up its Runechant generation as well, adding a cascade of difficult to mitigate arcane damage to our already efficient physical attacks. Even the lowly Canopy Shelter suddenly becomes an offensive powerhouse when we get to double up on its Might generation.
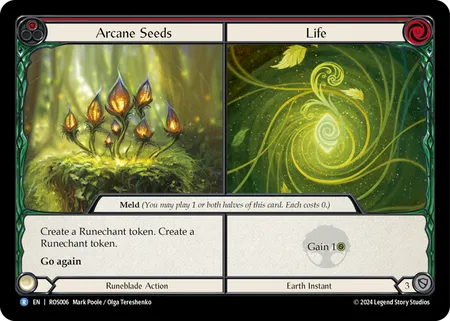
Arcane Seeds||Life
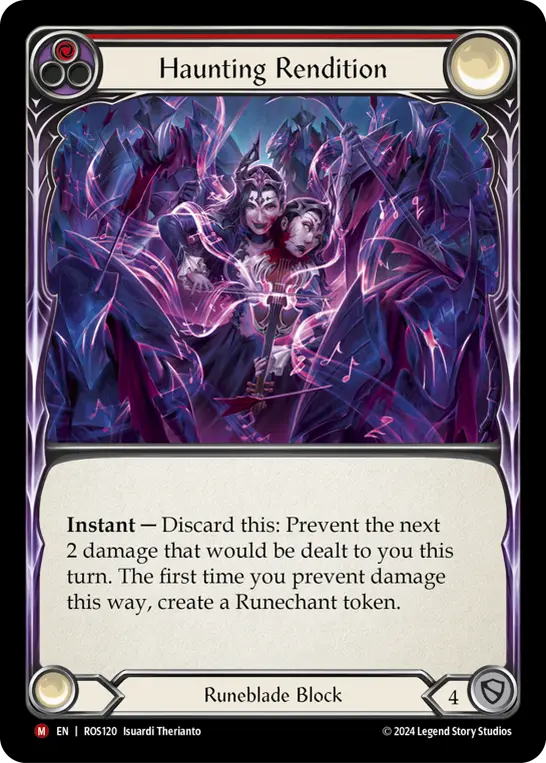
Haunting Rendition

Canopy Shelter
And of course, all of that is before we even get to the strongest interactions an online Florian has access to. But to get into those, first we need to discuss…
The Equipment
If there is any class that can give Warrior a run for its money in the discussion of most powerful equipment suites in the game, it’s almost certainly Runeblade. Face Purgatory might just be one of the most frightening head pieces ever printed, and its incredibly potent disruption can’t be understated. Watch for your opponent to overextend on a power turn that needs a full hand (such as Bloodrush Bellow from Brute or Bonds of Agony from Assassin) to really get maximum value from the forced discard effect.
We can also use the additional blocking cards with Face Purgatory to help fill our own graveyard to feed our decompose effects without sacrificing too much of our hand as well. Well Grounded can also be used as an instant speed defensive tool that doubles as another Earth card to feed our hungry decompose effects.
However, the two pieces of equipment that really shine the brightest in Florian are Barkskin of the Millennium Tree and Grasp of the Arknight. Both these pieces of equipment are powerful in their own right, but also benefit immensely from banished Earth cards. Barkskin being able to make two Embodiments of Earth can singlehandedly brick-wall an opponent who wanted to push a large amount of damage on a single turn. In addition to its own block value, we’re adding an additional 2 to each non-attack action we defend with, juicing most of our blocks to eyewatering value. Breaking out the Barkskin should almost immediately shut down an opponent’s turn, so don’t be afraid to leverage it as soon as you're online and the opponent presents a large hand.
On the opposite end of the turn cycle, Grasp of the Arknight, creates an absolute dominant tide of value once we're online. With a single blue we can make two Runechants, and send them alongside our trusty Reaping Blade, representing 5 damage in a split package of physical and arcane damage. Combining this slow creeping tide with our excellent defensive package, we quickly put our opponent in a position to find ways to urgently close the game before they’re overtaking by the creeping inevitability of the Rotwood.
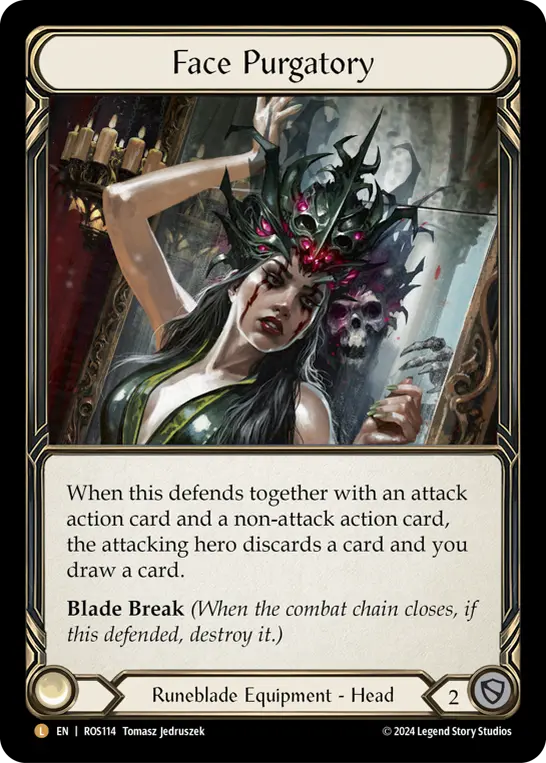
Face Purgatory
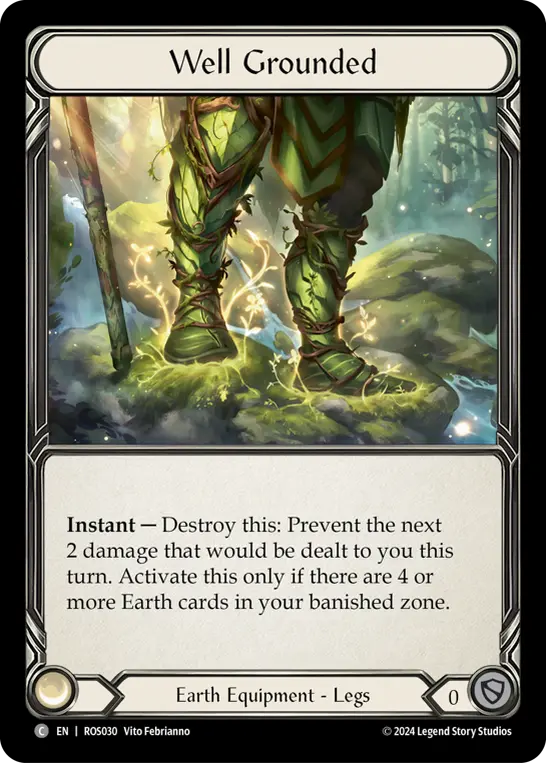
Well Grounded
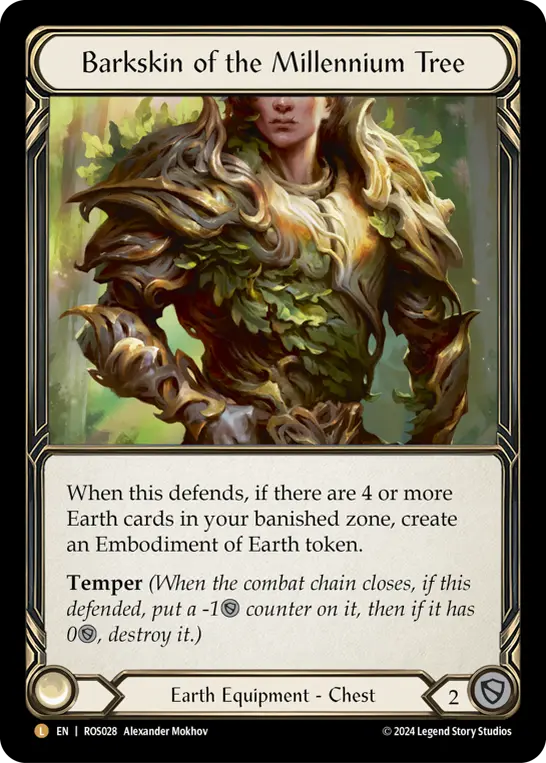
Barkskin of the Millennium Tree
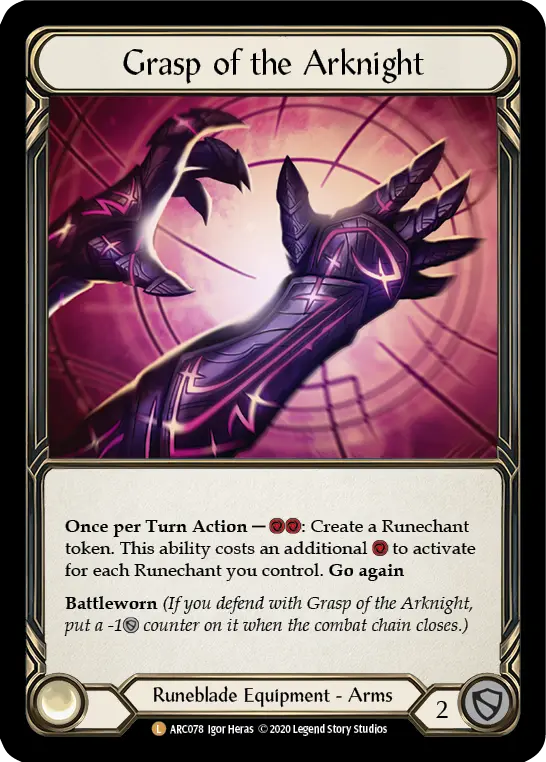
Grasp of the Arknight
The Sideboard
Much like Fang, we have a very strong primary gameplan that doesn’t need to change too significantly between many of our most common opponents. We want to always keep the goal of banishing our Earth cards in the most efficient way possible at the forefront of our mind as we move through our turns. However, the Rotwood Harbinger understands that tending a successful garden takes time, and doesn’t need to rush to reach his goal quite as quickly as the Dracai of Blades. Like Fang, we want to tailor our approach to our goal based on the opponent, and wrap our decisions around the best way to stop what our foe is attempting to do.
Against a fast, aggressive opponent, like Cindra or Azalea, we can prioritize our defensive tools. Block heavily and slowly build up our graveyard, leaning more on cards like Rootbound Carapace to get our cards banished, while saving our disruptive Felling of the Crown and Plow Under to dissuade our opponent from trying to take turns off to set up large offensive pushes.
Against the slower decks, we have much more flexibility to utilize some of our more potent offensive tools to help keep our opponent on the defensive while we tend our garden. Channel the Millennium Tree can offer some incredible offensive power over multiple turns to punish a slow deck that gives us too much breathing room. And never be fooled into thinking the Rotwood Harbinger can’t break out the old aggro Runeblade toolkit of cheap, efficient attacks, such as Swarming Gloomveil and Bramblespark to throw a surprising amount of damage at an unsuspecting opponent who isn’t prepared for our big offensive pushes even before we’ve reached our online state.

Channel the Millennium Tree
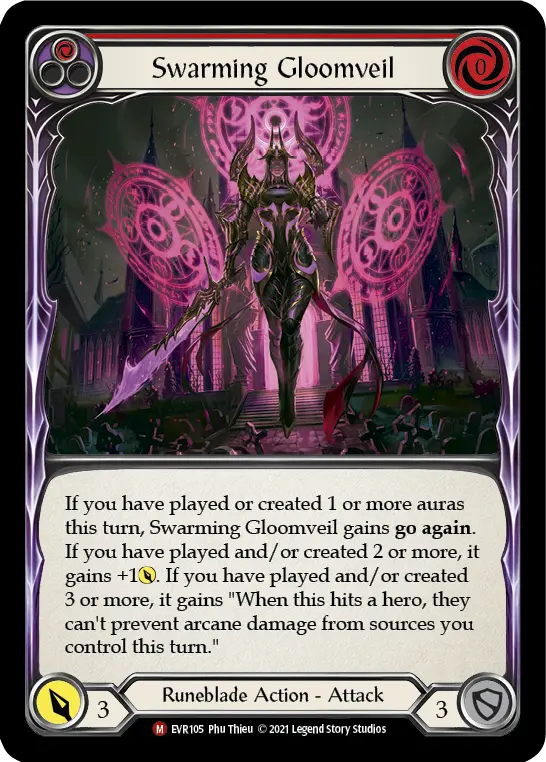
Swarming Gloomveil
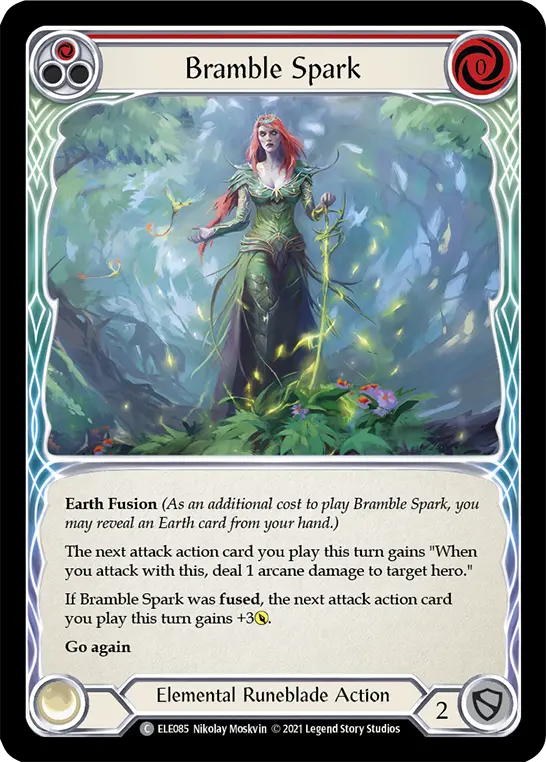
Bramble Spark
This solid streamlined core gameplan also leaves us a lot of flexibility in our sideboard to target specific opponents that we may wish to single out. Warmonger’s Diplomacy can be an excellent tool to thwart a bothersome Ranger like Azalea from throwing her large, dominated arrows. Condemn to Slaughter can come in to help out against the troublesome auras of decks like Prism or Vynnset. Erase Face can also be a common utility disruptive piece that shines in lots of different matchups, denying an opponent many of the key synergies to make their deck run smoothly.
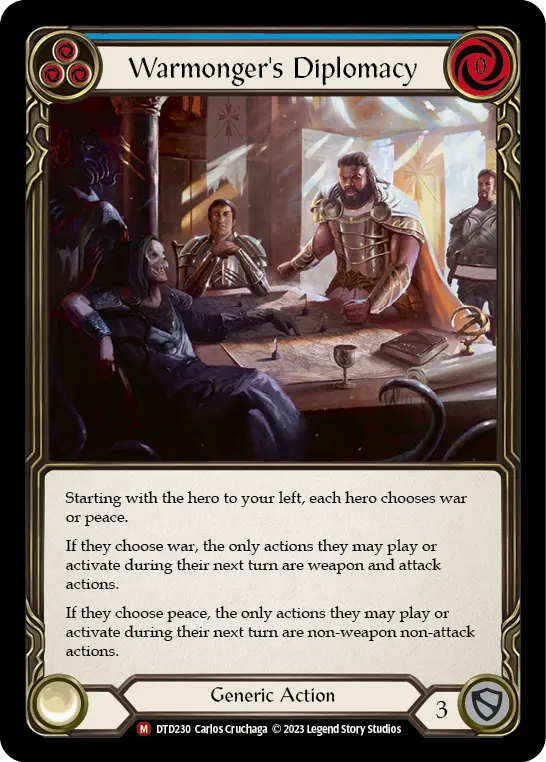
Warmonger's Diplomacy
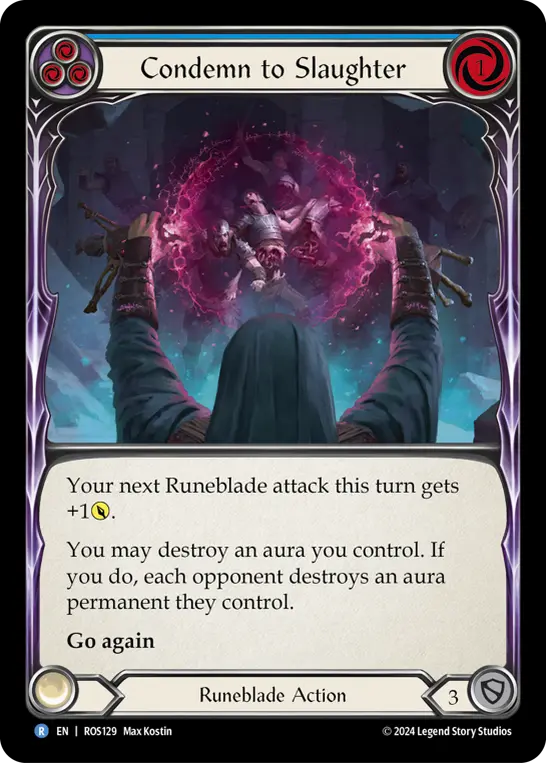
Condemn to Slaughter

Erase Face
At the end of the day, the choices are yours and yours alone. We’re entering an unprecedentedly wide metagame with new challenges coming from all angles.
Whether you choose to serve our fallen Emperor, embrace the Rotwood, or chart your own course across the High Seas, no amount of advice will compare with practice, comfort, and experience. Gather the players of your local game store together and prepare. Test and strategize. Bring a notebook, and write things down. What worked? What didn’t work? Learn from your mistakes but don’t dwell on them. Build upon your successes, but don’t let them define your self-worth. Every game is just a lesson to take to the next game, and the next after that. Keep at it and maybe, just maybe, you’ll be the next National Champion to lift that trophy high. Never stop climbing.
I’ll see you at the top.